ShipStation is an outstanding tool for managing the fulfillment and shipping process. ShipStation offers the outstanding capability for printing bulk packing and shipping labels as well as many other capabilities to streamline your business operations and save your business time.
The first step in setting up an integration with ShipStation is to sign up for a ShipStation account. You can sign up for an account by visiting the ShipStation website. Once you have your account credentials, you are ready to proceed with configuring your CoreCommerce admin to support the ShipStation integration:
- Log in to the admin panel of your online store.
- Go to Settings
 > Plug-In Apps
- Click on ShipStation.

- Make sure "Enabled" is set to "YES," then fill in your ShipStation username and password and click on Save. Make a note of the values in the fields below. You will need these to configure your ShipStation account.

- Log in to your ShipStation account.
- Click on Settings, then Selling Channels, then Store Setup.
- Click on "Connect a Store or Marketplace."
- In the popup, search for "Custom," and then click "Custom Store."
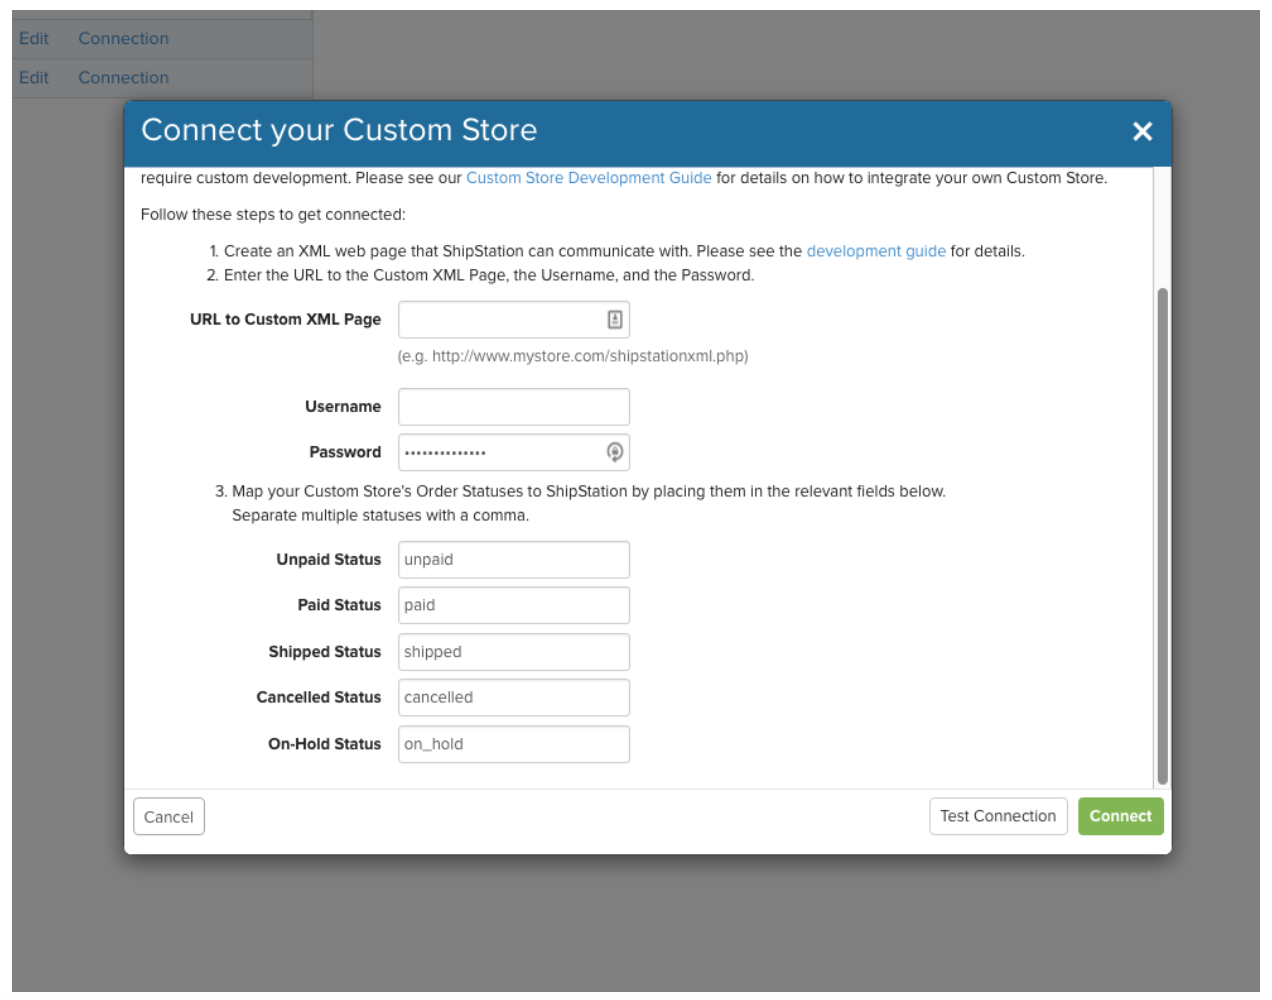
- Add the "Script URL" from CoreCommerce into the "URL to Custom XML Page" field.
- Add your ShipStation username in the Username field.
- Add your ShipStation password in the Password field.
- For mapping, the statuses, take the values listed in the CoreCommerce admin panel (see screenshot above) and input them into the appropriate ShipStation fields. For example, input "Pending, Backorder" into the "Unpaid Status" field during ShipStation set up.
- Repeat this process for each of the five statuses.
- Then, click on Connect to save the store integration.